Tiamaranta Mesa Guide
Greetings Daevas,
Aion's third world, Tiamaranta Mesa, has arrived. Explore our guide to help you conquer this new zone with confidence.
World Guide
In this world, you'll be matched with Daevas from the new server and play a variety of content together.
Experience a broader world where you can test your own skills and the unity of our server!
Guide to World Main Settings
It is a place where your server is matched with a newly selected server based on each server’s environment to play content together.
It is a place where you meet more Daevas and it is also the area where you play main content after reaching level 60.
Please be sure to review the important details to enjoy a more rewarding experience in the World.
[World Main Settings]
Information |
|
|
Level |
Lv 60 to 65 |
|
Number of players |
Only a fixed number of players per race can enter. |
|
Matching Server |
Grand World Israphel/Siel/Elyos Alliance vs. Israphel/Siel/Asmodina Alliance |
|
World Highlights |
(1) Watching Eye (2) Dragon Lord's Records |
|
Trade |
(1) Personal Trade Unavailable · Only items in temporary trade status can be traded. (2) Private Store Unavailable |
|
Unavailable content |
(1) Matchmaker (2) Mailbox (3) Influence Ratio (4) Ranking (5) Dimensional Forge |
Tiamaranta Mesa Basic Information
The entry level for Tiamaranta Mesa is level 60, and you can travel there using the Boarding Device at Inggison Illusion Fortress (Elyos) and Gelkmaros Fortress (Asmodian).
Clicking the <To Tiamaranta Mesa> Boarding Device located at each faction’s bind point in the Balaurea will transport you there.
|
[Elyos] Inggison Illusion Fortress > Somnium Boarding Device |
[Asmodian] Gelkmaros Fortress > Nornir Boarding Device |
|
|
|
Tiamaranta Mesa is divided into two main parts: the Ground and the Sky
On the Tiamaranta Mesa Ground, the Elyos and Asmodian regions are separated, each centered around their respective strongholds on either side, and flying is not allowed in these areas.
The central area serves as the battlefield’s core—a Disputed Land where inter-racial combat is possible. By capturing the Watching Eye, you can enjoy various gameplay features. Infinite flight is not allowed in the Disputed Land.
|
Tiamaranta Mesa Ground |
|
|
| Tiamaranta Mesa Sky |
 |
The Ground is a typical field where you can enjoy most of the content. The Sky is a flying zone where you can access advanced rewards and content. The methods to move to the Sky are as follows:
- Use the [Bind Point Express Teleport Statue] located within each faction’s bind point in Tiamaranta Mesa to move to the location.
- Pay Kinah to Shugo on the ground to move to the location.
- Capture the Large Watching Eye and use the Updraft inside to move to the location.
- Use the Updraft inside each faction's 1st First Large Watching Eye, or the Updraft inside the Large Watching Eye in the Disputed Land.
|
Shugo that transports you to the Sky |
|
|
| Large Watching Eye Updraft |
 |
Now, to fully prepare for World gameplay, complete the final checks through the NPCs aboard the battleship. Then, glide into the field from the launch point on the outer deck of the airship.
Main Content 1. Watching Eye
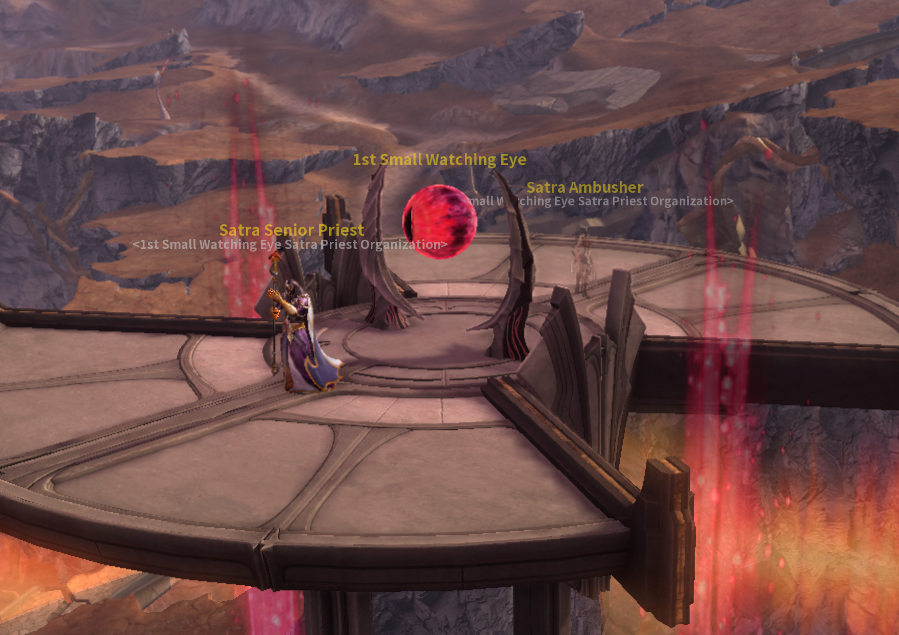
The Watching Eye is located in the Tiamaranta Mesa Ground and is classified into three sizes: small, medium, and large. The rewards received after capturing a Watching Eye vary depending on its size.
The Watching Eye located in each faction’s territory are fully controlled by their respective factions, allowing quests to be carried out without any capture activity.
The Watching Eye, located in the central Disputed Land, can be contested and captured by both factions; however, once captured, it cannot be recaptured by the same faction.
|
Large Watching Eye |
|
|
The Watching Eye, when occupied by the Elyos, Asmodian, or Balaur, will become vulnerable again after 5 minutes for the Small, 10 minutes for the Medium, and 15 minutes for the Large. If it is not captured within 5 minutes after becoming vulnerable, control will reset to the Balaur.
The Watching Eye consists of two floors. After defeating the monsters on the first floor, players can ride the Updrafts on either side to reach the second floor. By defeating the surrounding monsters and destroying the 'Watching Eye', the area can be captured.
The faction of the character with the highest contribution during the capture will gain control of the area.
|
Watching Eye Updraft |
|
|
| 2nd Floor Watching Eye |
 |
The Watching Eye can be destroyed more quickly and effectively by using the 'Dark Frost Needle', which is sold by NPCs aboard each faction's battleship. The Dark frost Needle can be purchased with Kinah, and the damage increases based on the user's accumulated enchantment level.
[Rewards Based on the scale of the Watching Eye]
|
Scale |
Quantity |
Available Content Upon Capture |
Rewards |
|
Large |
1 Faction's Bind Point |
· Occupying Faction Order Quest · Chance for an NPC to appear that sells Legion Named Summoning Scrolls · Ability to travel to the Sky via updrafts · Kisk installation · Creating a Route to the Watching Eye |
Forgotten Dragon Lord's Weapon Piece Lv 59-60 Stigmas Watching Eye Manastone Selection Box Large Watching Eye Relics Bundle Unconfirmed Tiamaranta Painting Shard |
|
Medium |
1 Faction's Bind Point |
· Occupying Faction Order Quest · Placement of main dungeon entrances · Better access to the Relic Exchange NPC feature · Kisk installation · Treasure Map Appraiser Shugo (appears in the 5th Medium Tower) · Creating a Route to the Watching Eye |
Lv 59-60 Stigmas Watching Eye Manastone Box Medium Watching Eye Relics Bundle Unconfirmed Tiamaranta Painting Shard |
|
Small |
1 Faction's Bind Point |
· Occupying Faction Order Quest · Kisk installation · Appearance of the Geologist Shugo who sells Specialty Goods Ingredient Boxes for Delivery · Creating a Route to the Watching Eye |
Unconfirmed Tiamaranta Painting Shard |
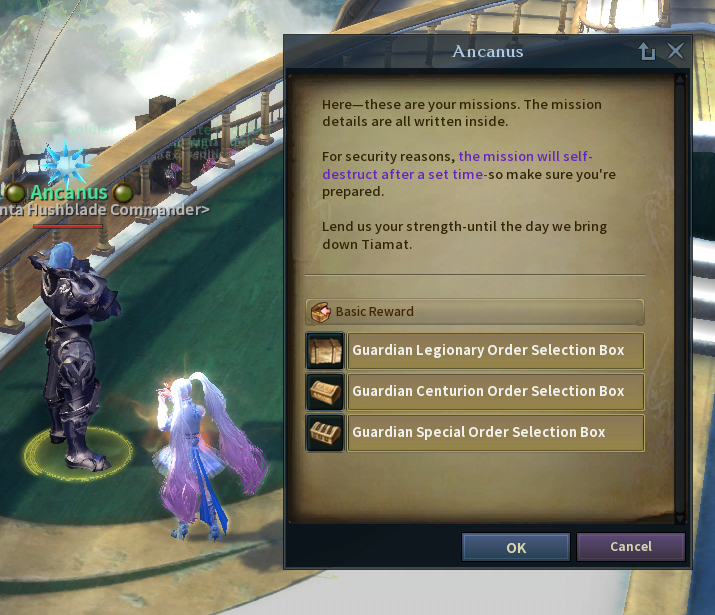
When traveling by faction battleship to Tiamaranta Mesa, you can immediately meet the "Tiamaranta Commander," who offers daily order quests.
(Elyos: Ancanus / Asmodian: Skafir)
Upon completing the quest, you will receive a total of three Order Selection Bundles, allowing you to choose your preferred difficulty level.
|
Each Faction's Commander |
|
|
Main Content 2. Black Cloud Traders
A variety of goods can be obtained from the Black Cloud Traders, who spawn throughout Tiamaranta Mesa.
All items offered by Black Cloud Traders can be purchased through Kinah.
- Buy items from Black Marketer Shugo > Dragon Lord's Records Materials Bundle, Special Goods, and Treasure Maps
You can purchase a variety of items from Black Marketer Shugo who spawns at certain times.
[Black Marketer Shugo Sales List]
|
Purchasing Dragon Lord's Records Materials |
Purchasing Special Goods |
Purchasing Treasure Maps |
|
|
|
|
|
[All servers (excluding Wind/Lumi)] Dragon Lord's Records Bundle Mysterious Dragon Lord's Records Bundle |
[All servers (excluding Wind/Lumi)] Noble Dragon Lord's Records Bundle Relics Bundle of Black Marketers Medal Shard Box of Black Marketers |
[All servers (excluding Wind/Lumi)] Black Marketer Shugo's Treasure Map Box Mysterious Dragon Lord's Records Bundle |
|
[Wind/Lumi Servers] Dragon Lord's Records Bundle Mysterious Dragon Lord's Weapon Piece Box |
[Wind/Lumi Servers] Noble Dragon Lord's Records Bundle Noble Dragon Lord's Weapon Piece Box Honor Guard Weapon Appearance Box |
[Wind/Lumi Servers] Black Marketer Shugo's Treasure Map Box Mysterious Dragon Lord's Records Bundle |
- Exchange Specialty Goods for Delivery > Obtain Dragon Lord's Records Materials Bundle and Light Adventurer Mark Bundle
You can exchange with the Geologist Shugo, who randomly spawns at the Small Watching, using Specialty Goods Ingredient Boxes for Delivery.
After purchasing the Specialty Goods Ingredient Box for Delivery, you can visit a Black Cloud Traders Staff on your faction’s battleship to exchange the box for rewards.
|
Geologist Shugo on the map |
|
|
| Exchange for Specialty Goods Ingredient Boxes on battleship |
 |
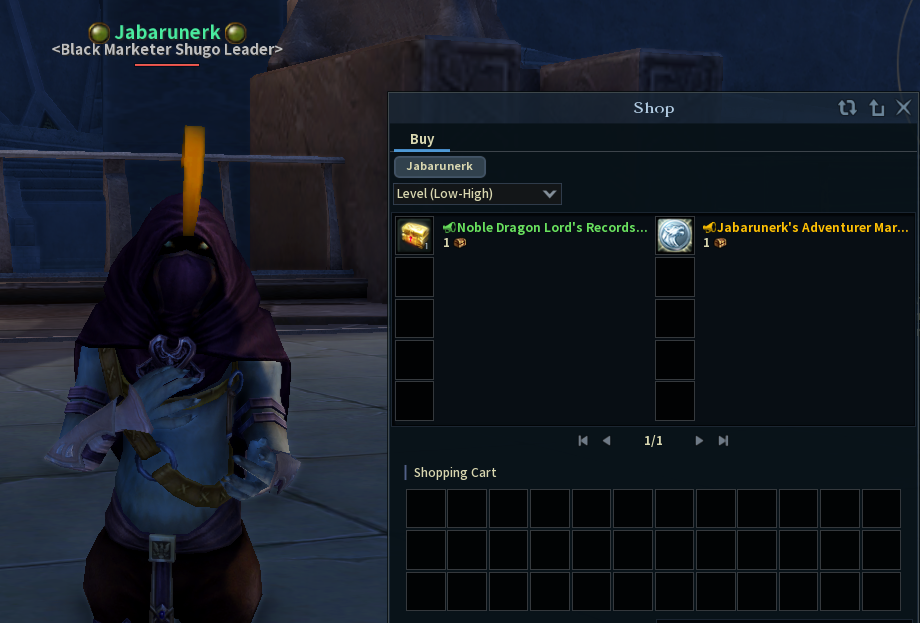
- Exchange Specialty Goods > Obtain Jabarunerk's Adventurer Mark Bundle
At the Black Cloud Traders' Campsite, the Trader Chief spawns daily at 6:00 PM, 8:00 PM, and 10:00 PM. During these times, you can exchange Kinah for Black Cloud Traders Specialty Goods.
You can only carry one of these Specialty Goods in your inventory, and it will be destroyed 20 minutes after purchase. To exchange it for a reward, you must find the Black Marketer Jabarunerk, who spawns daily at 6:00 PM, 8:00 PM, and 10 PM:00. Jabarunerk is only available for 30 minutes, so you must find him quickly, and exchanges are limited to once per week.
|
Trader Chief Tiunerk |
|
|
| Black Marketer Jabarunerk |
 |
Main Content 3. Dragon Lord's Records
- Dragon Lord's Record Box
The 'Dragon Lord’s Record Box' spawns at random locations across Tiamaranta Mesa. From these boxes, you can obtain Dragon Lord's Records Materials.
Each Record Box you open has a chance to drop 1 of the followings.
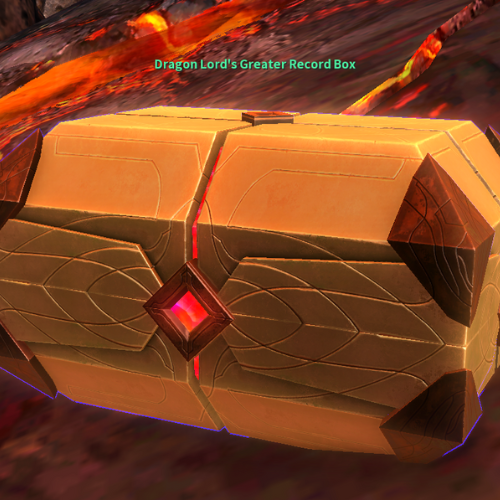
The Dragon Lord’s Record Box is divided into Lesser, Regular, and Greater grades, with higher grades offering a greater chance of obtaining better rewards.
Dragon Lord's Greater Records Box only spawns in Tiamaranta Sky and the Basilika Cavern.
When the Box spawns, a message is displayed, and its location is revealed on the map with an icon.
When a Dragon Lord's Greater Record Box spawns in the Basilika Cavern, the Basilika Cavern becomes a PvP zone. The Greater Record Box will not spawn during the Sunayaka Raid.
Dragon Lord's Lesser Record Box has a set chance to drop monsters instead of rewards.
|
Dragon Lord's Lesser Record Box |
Dragon Lord's Regular Record Box |
Dragon Lord's Greater Record Box |
|
|
|
|
|
[Main rewards] Dragon Lord's Record Page Dragon Lord's Record Cover Lv 62 Stigma |
[Main rewards] Dragon Lord's Record Page Dragon Lord's Record Cover |
[Main rewards] Dragon Lord's Record Page Dragon Lord's Record Cover Dragon Lord's Record Bookmark |
- Dragon Lord's Records
You can collect Dragon Lord's Records Materials and exchange them for the Dragon Lord’s Records with the Tiamat's Favorite Scientist aboard the battleship (Elyos – Erzera / Asmodian – Krulos).
|
[Elyos] Erzera |
[Asmodian] Krulos |
|
|
 |
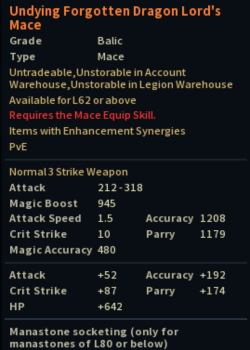
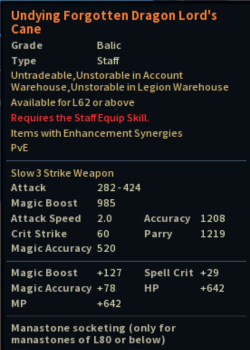
When using the Dragon Lord’s Records, there is a set probability of obtaining an 'Undying Forgotten Dragon Lord's Weapon Box'.
[Undying Forgotten Dragon Lord's Weapons Info]
|
Undying Forgotten Dragon Lord's Sword |
Undying Forgotten Dragon Lord's Mace |
Undying Forgotten Dragon Lord's Dagger |
|
|
|
|
|
Undying Forgotten Dragon Lord's Orb |
Undying Forgotten Dragon Lord's Tome |
Undying Forgotten Dragon Lord's Greatsword |
|
|
|
|
|
Undying Forgotten Dragon Lord's Polearm |
Undying Forgotten Dragon Lord's Staff |
Undying Forgotten Dragon Lord's Cane |
|
|
|
|
|
Undying Forgotten Dragon Lord's Bow |
Undying Forgotten Dragon Lord's Chainsword |
Undying Forgotten Dragon Lord's Dragon Claw |
|
|
|
|
|
Undying Forgotten Dragon Lord's Dimensional Sword |
- |
- |
|
|
- |
- |
Sub-content 1. Raids and Field Named
| RvR Raid Monster Spawn Location |
 |
RvR Raid Monsters
Spawn times vary by world, and both Elyos and Asmodian participate together in the challenge.
Based on contribution to the raid monster's defeat, the faction that successfully completes the raid will receive both drop rewards and participation grade rewards, while the unsuccessful faction will receive only participation grade rewards.
If you are unable to defeat for an hour, both factions will earn failure rewards.
|
Named |
Time |
Main Rewards |
|
Arch Haechi |
|
[Drop Rewards] Arch Diad Haechi Skill Book Page Greater Godstone Bundle Enraged Agent Weapon Box Enraged Agent Armor Box Timeless Fabled Weapons Subterra Raiders Fabled Armor Lumiel's Crown Fighting Spirit Gem Forgotten Dragon Lord's Weapon Piece [Victory/Participation Rewards] Arch Diad Haechi Skill Book Page Storming Skill Book Page Raging Soul [Supplies] Regular Enchanting Supplement (Eternal) Sableterra Raiders Wings Sableterra Raiders Accessories (Necklace/Ring) Forgotten Memory Shard (Superior/Heroic/Fabled) Legion Production Marks (Regular, Greater, Major) [Supplies] Lesser Socketing Supplements (Eternal) Fighting Spirit Gem |
|
|
||
|
Arch Tatar |
|
[Drop Rewards] Arch Tatar Skill Book Page Greater Godstone Bundle Enraged Agent Weapon Box Enraged Agent Armor Box Timeless Fabled Weapons Subterra Raiders Fabled Armor Lumiel's Crown Fighting Spirit Gem Forgotten Dragon Lord's Weapon Piece [Victory/Participation Rewards] Arch Tatar Skill Book Page Storming Skill Book Page Raging Soul [Supplies] Regular Enchanting Supplement (Eternal) Sableterra Raiders Wings Sableterra Raiders Accessories (Necklace/Ring) Forgotten Memory Shard (Superior/Heroic/Fabled) Legion Production Marks (Regular, Greater, Major) [Supplies] Lesser Socketing Supplements (Eternal) Fighting Spirit Gem |
|
|
||
|
Governor Sunayaka |
|
[Drop Rewards] Sunayaka's Headdress Enraged Agent Weapon Box Enraged Agent Armor Box Silent Fabled Weapons Irkala's Illusion Weapon Raging Soul Sableterra Raiders Earrings Empyrean Lord Lumiel's Crown Forgotten Dragon Lord's Weapon Piece [Victory/Participation Rewards] Kinah Bundle Sableterra Raiders Earrings Enraged Agent Weapon Box Enraged Agent Armor Box (excludes participation rewards) Irkala's Illusion Weapon (excluding participation rewards) Forgotten Memory Shard (Superior/Heroic/Fabled) Superior Manastone Selection/Random Bundle Fighting Spirit Gem |
|
|
||
|
Dredgion Interception |
|
[Victory/Participation Rewards] Silent Fabled Weapons Forgotten Memory Shard (Superior/Heroic/Fabled) Legion Mark (Regular, Greater, Major) Kinah Bundles by Grade [Cube Reward] Kinah Bundle |
 |
||
Raid rewards are distributed to up to 2,000 players from each faction—both victorious and participating—and can be obtained based on a set probability.
For rewards with assigned grades, the type of reward and its probability vary depending on the grade.
Field Named
Named monsters can only be challenged and defeated by parties.
|
Named |
Time |
Main Rewards |
|
Defeat Action-taker Kichikor and Adviser Kukuru Appearance of Devoted Pukikor |
21:00 Everyday |
[All servers (excluding Wind/Lumi)] Sableterra Raiders Necklace Subterra Raiders Ring Lv58 Skill Book Lv 62 Stigma Wrathful Soul Kinah Lv 60 Random Manastone Bundle (From Kichikor and Kukuru) [Wind/Lumi] Sableterra Raiders Necklace Subterra Raiders Ring Lv 62 Stigma Dazzling Crystal Lv 60 Random Manastone Bundle (From Kichikor and Kukuru) |
|
|
||
|
Devoted Ativas |
21:30 daily |
[All servers (excluding Wind/Lumi)] Sableterra Raiders Necklace Subterra Raiders Ring Lv58 Skill Book Lv 62 Stigma Wrathful Soul Kinah [Wind/Lumi] Sableterra Raiders Necklace Subterra Raiders Ring Lv 62 Stigma Dazzling Crystal |
 |
||
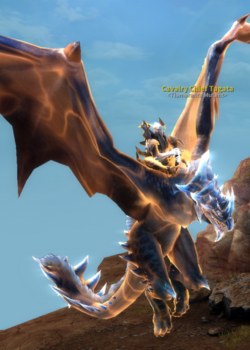
- Special Named Monsters (Mutants)
It can be cleared solo, and some named monsters spawn in random locations.
Monsters Information |
|||
|
Haunting Kakaro
|
Mysterious Tagus
|
Yndigo Blackice
|
Astoos the Adept
|
|
Pounding Tatamo
|
Cavalry Chief Tagata
|
Sergeant Darsa
|
Sailing Tumer
|
|
Whirling Augusta
|
Jeweloop Vitale
|
Brightglow Bavato
|
Combat Sergeant Hasan
|
|
Destroyer Kahira
|
Fragmented Gapemaw
|
Bendo the Traitor
|
Burning Anesto
|
|
Archeson Halberdsman
|
Fragmented Pyreogre
|
Obstinate Perut
|
Wandering Alati
|
|
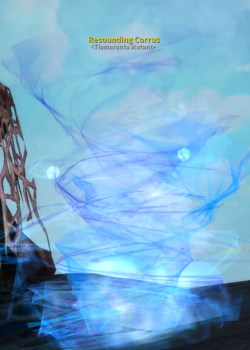
Resounding Corrus
|
- |
- |
- |
Sub-content 2. Fortress of Determination
Fortress of Determination is a new instanced dungeon accessible from Tiamaranta Mesa. You can enter through a portal near the Heart of Wrath.
Fortress of Determination Information |
||
|
Max Players |
6 Players |
|
|
Entry Level |
Lv 60 to 65 |
|
|
Entry Count |
Resets daily at 9:00 |
|
|
Entry Location |
World Tiamaranta Mesa |
|
Fortress of Determination is a time-attack-style instanced dungeon, and the number of named monsters you defeat inside determines the grade of the bonus reward box.
Each time you defeat a named monster, the Shortcut Guide 'Bronerk' appears. After defeating the desired named monsters, you can ask Bronerk to go directly to the final boss.
Bronerk is also located at the starting point of the Fortress of Determination, allowing you to move directly to the final boss right after entering the dungeon.
[Rewards]
Equipment drops based on a fixed probability, while Manastones have a 100% drop rate and can be obtained according to the party loot distribution settings.
|
NPC Name |
Drop Rewards |
|
Vasharti |
Fortress Guardian's Earrings (Eternal) Fortress Guardian's Belt (Eternal) Vasharti's Key Vasharti's Manastone Bundle x3 |
|
Nishaka, Zantaraz, Tarotran, Xasta and Kuhara |
Superior Manastone Selection Box |
|
Premium Vasharti Treasure Chest |
Fortress Guardian's Headdress (Eternal) Fortress Guardian's Necklace (Eternal) Nishaka's Manastone Selection Box Zantaraz's Manastone Selection Box Tarotran's Manastone Selection Box Xasta's Manastone Selection Box Kuhara's Manastone Selection Box |
|
Major Vasharti Treasure Chest |
Fortress Guardian's Headdress (Eternal) Fortress Guardian's Necklace (Eternal) Zantaraz's Manastone Selection Box Tarotran's Manastone Selection Box Xasta's Manastone Selection Box Kuhara's Manastone Selection Box |
|
Greater Vasharti Treasure chest |
Fortress Guardian's Headdress (Eternal) Fortress Guardian's Necklace (Eternal) Tarotran's Manastone Selection Box Xasta's Manastone Selection Box Kuhara's Manastone Selection Box |
|
Regular Vasharti Treasure Chest |
Fortress Guardian's Headdress (Eternal) Xasta's Manastone Selection Box Kuhara's Manastone Selection Box |
|
Lesser Vasharti Treasure Chest |
Fortress Guardian's Headdress (Eternal) Kuhara's Manastone Selection Box |
|
Common Vasharti Treasure Chest |
Fortress Guardian's Headdress (Eternal) |
Sub-content 3. Painting and Treasure Map
The buffs from completing the Storybook in the new world provide offensive stats: Magical Accuracy +3 and Accuracy +8.
If you have completed the Tiamaranta Painting, you can collect Fine Tiamaranta Painting Traces obtained afterward and assemble them to receive an Unappraised Tiamaranta Treasure Map based on a set probability.
This Treasure Map can be appraised by taking it to "Mercatonerk," located at the 1st Large Watching Eye. Upon appraisal, you will receive one Treasure Map of either Lesser, Regular, or Greater determined by a set probability.
|
1st Large Watching Eye |
|
|
| Mercatonerk |
 |
When you hover your mouse over the acquired Treasure Map, a hint about the location where the map can be used will appear. If you use the Treasure Map at the hinted location, a Treasure Chest will appear.
|
Using the Treasure Map |
|
|
| Appearance of the Treasure chest |
 |
Sub-Content 4. Urgent Order PVP Quest
When entering the Land of Fissure and Land of Petrification Tiamaranta Garrison on the Tiamaranta Mesa Ground, you will automatically receive a PvP quest to defeat enemies of the opposing faction. This quest can be repeated twice per week, and as a reward, you can obtain Kinah and Unconfirmed Painting Shard.
|
Emergency Orders Quests |
 |
Sub-content 5. Legion Named
In the Tiamaranta Mesa field, you can obtain a "Tiamaranta Grudge Stone" with a set probability from special named monsters (Mutants).
The Tiamaranta Grudge Stone can be crafted into a Tiamaranta Essence through Legion crafting. This Essence can then be exchanged for an Ancient Summoning Scroll Bundle from the Archaeologist — Elyos: Christine / Asmodian: Mondelius — who appears when a large Outpost is occupied.
When exchanging the Ancient Summoning Scroll Bundle, there is a set probability of obtaining a Ruthless Ossek or Continuum Guardian Arachi Summoning Scroll. In some cases, a mutated version may be summoned.
|
Ruthless Ossek |
Continuum Guardian Arachi |
|
|
 |
The Ancient Summoning Scroll can only be used in designated locations. When the named monster appears, the area will temporarily change into a zone where PvP is enabled even among members of the same faction.
[Drop Rewards]
|
NPC |
Rewards |
|
Ruthless Ossek Continuum Guardian Arachi |
Lv 60 Superior Godstone Lv58 Skill Book Relics Kinah |
|
Mutated Ruthless Ossek Mutated Continuum Guardian Arachi |
Superior Godstone Lv 60 Superior Godstone Lv58 Skill Book Relics Kinah |
Other tips for playing in Tiamaranta Mesa
Field Buffs: Seed NPCs
Tiamaranta Ground consists of a central Garrison and four regions. Seeds exist in the Disputed Land.
Defeating seeds gives you a chance to obtain buff skill items.
You can only carry one buff item at a time, and it lasts for 10 minutes.
This item can only be used in the Tiamaranta Mesa region and cannot be used in the Dredgion, Sunayaka, or Arch Tatar raid zones.
|
NPC |
Item Buff Effects |
|
Seed of Fissure
|
Stuns the nearby opposing faction |
|
Seed of Wrath
|
HP, Attack Speed, and Speed buffs to nearby party members |
|
Seed of Gravity
|
Aether's Holds nearby opposing faction |
|
Seed of Petrification
|
Petrifies nearby opposing faction |
Field Buff: Objects in the Sky
In the Tiamaranta Mesa Sky, there are objects that grant buffs.
|
Stealth |
Movement Speed Buff |
|
|
 |
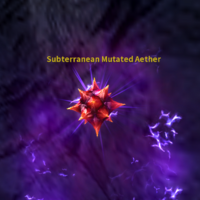
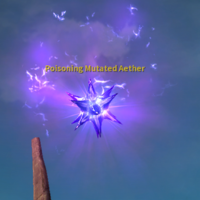
Field Buff: Aerial Mines
There are mines in the Tiamaranta Mesa Sky that deal damage and debuffs.
|
Subterranean Mutated Aether |
Poisoning Mutated Aether |
|
Stunned and Forced Crashed With Damage |
Poisoned With Damage |
|
|
 |


